Tank Control experiments #
I'm still a bit sad about Flash going away. Yes, I know lots of people hated it. But it was an amazing tool for quick prototypes. There are some projects that I keep revisiting, and over time I'm converting them to HTML5.
Last year I converted my Flash procedural tree generator (succeeded) and attempted to convert my Flash spaceship flyer (failed). This time I wanted to run my Tank Control prototype from 2012:
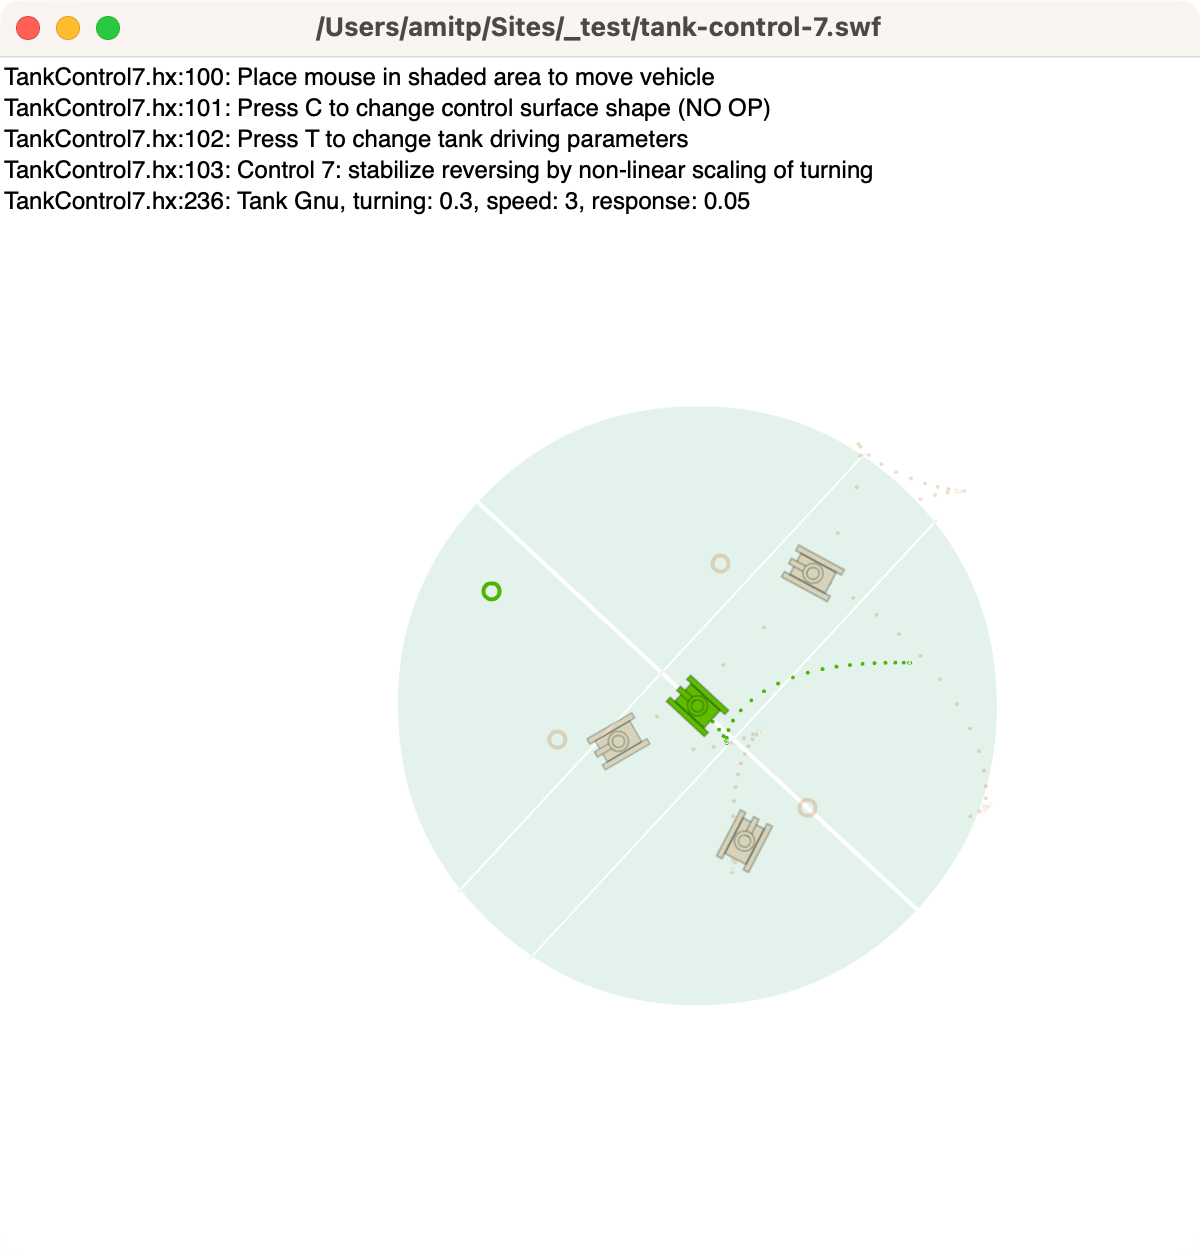
Labels: flash
Procedural tree generator #
I'm still a bit sad about Flash going away. Yes, I know lots of people hated it. But it was an amazing tool for creativity. One of the tiny fun projects I did was procedurally generating trees:
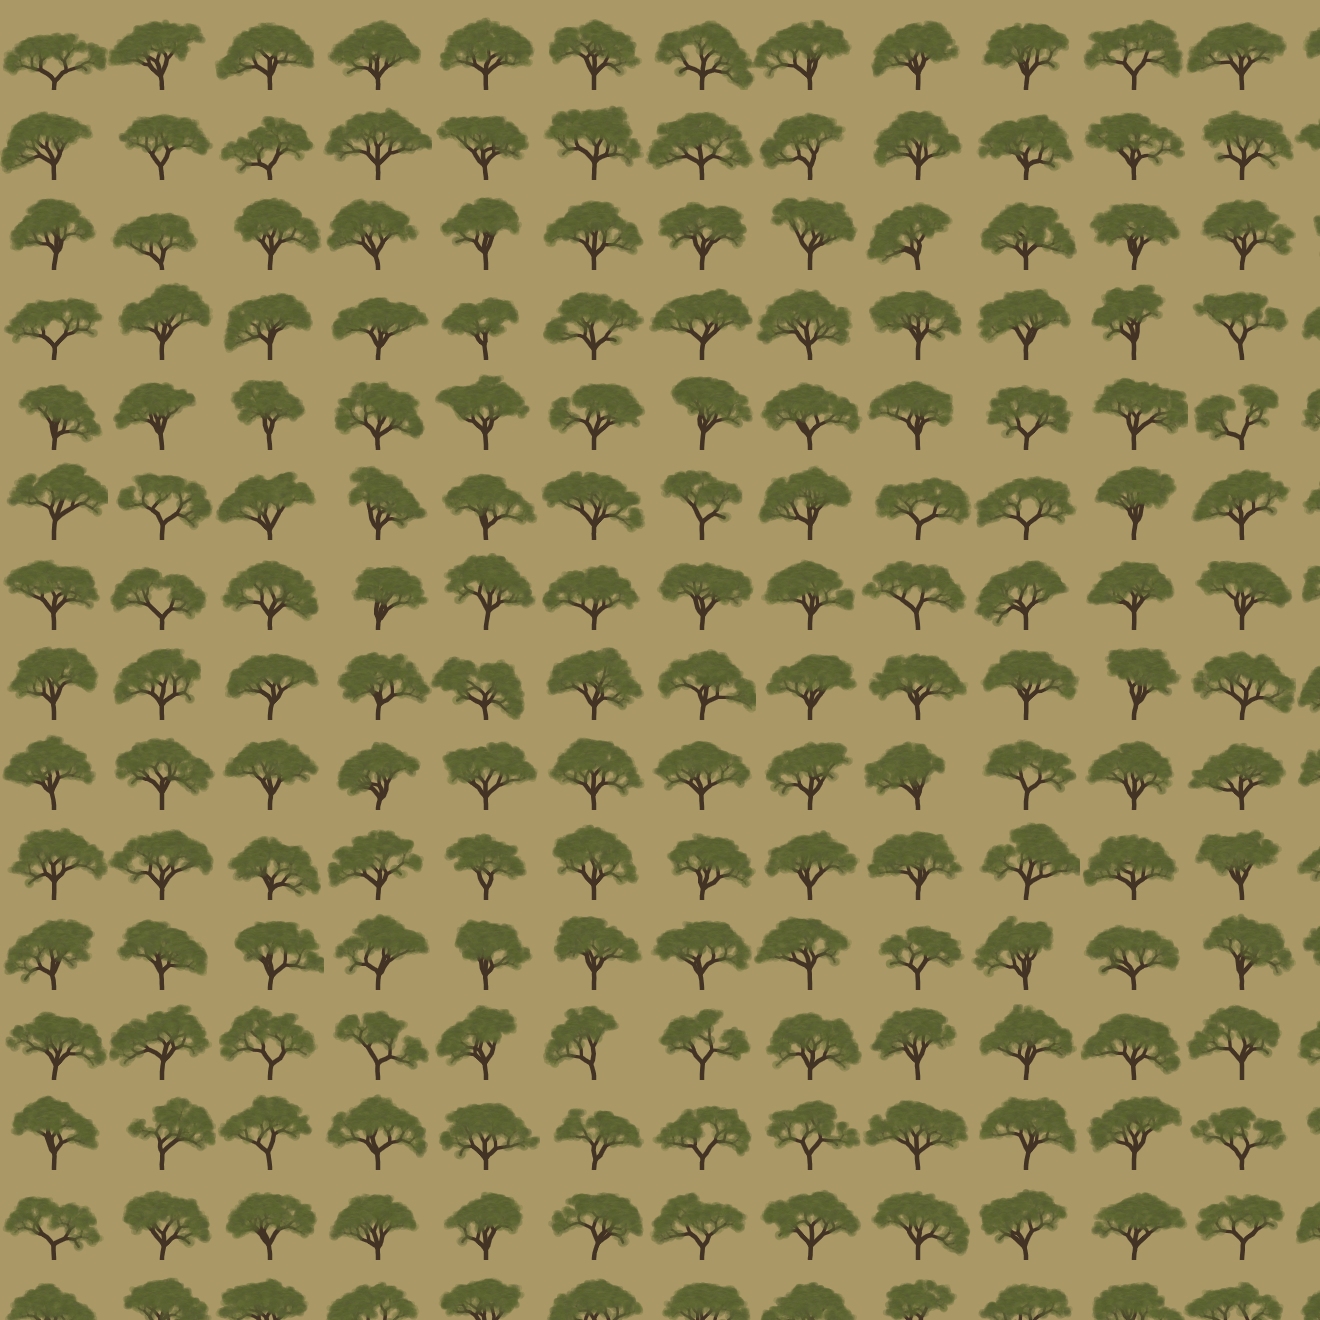
Labels: flash
Switching to Haxe #
Every few years I find a new language/platform for my experiments. I’d like to share them on the web, so I (mostly) limit myself to things that run in the browser. In the 1990s I used Java. In 2004, I started looking at Flash, but continued using Java. With help from Troy Gilbert, I switched to Flash in 2006, using the Motion-Twin Flash compiler (mtasc) instead of Adobe’s compiler. I continued using Flash, switching to Actionscript 3 and Adobe’s Flex compiler, to make Flash 9 and 10 applets. I also used Javascript for some projects. In an alternate history, Actionscript 3 was a possible future of Javascript/ECMAscript but that history didn’t come to pass. It’s a decent language, with things I miss from Javascript: static types, classes, packages, imports, etc. However, it’s time for a change of language.
I’ve switched from Actionscript to Haxe, Motion-Twin’s successor to mtasc. I’ve been watching Haxe over the years but was waiting for the right time. Unlike their mtasc compiler which can be used with the same source code as Adobe’s compiler, Haxe is a new language. It compiles to Javascript, Flash, Java, PHP, or C++, so it can be used for HTML5, Flash, iOS, Android, and webOS clients, as well as C++, Java, Node.JS, or PHP servers. I’m starting to work on new projects that are likely to involve: (1) HTML5 visualizations and games, (2) simple Flash games, and (3) C++ server code, so this seems like a good time to try Haxe. There are also libraries like NME that let me compile Haxe games to Windows, Mac, Linux, HTML5, Flash, iOS, Android, Blackberry, and webOS, if I want to go beyond web projects.
The language itself is nice. In addition to the things I’d expect (closures, packages, imports, classes, etc.), it contains things I’ve missed from my SML/OCaml days: typed unions, type inference, generics, and structural subtyping. It also has other nice features: external mixins, metadata, properties, explicit inlining, and macros. Everything’s an expression; there aren’t any statements. They understand the basics of covariance and contravariance. The compiler is written in OCaml. For a recovered programming language geek like me, there’s a lot going for it. It’s no Haskell or Scala but it’s a big step up from Actionscript. It’s also very … pleasant. I’m not sure how else to describe it.
I’ve not been using Haxe long, but have already had good luck with the multiplatform part, at least for Flash and Javascript. I had an algorithm for a Flash game, and I compiled it into Javascript and used it without any trouble. Since Actionscript, Javascript, and Haxe are all related, it works well. I’m less sure about how well it will work with C++, especially when it comes to garbage collection. There are probably lots of gotchas there. I also haven’t yet figured out how to use Javascript libraries from Haxe code; for my project I went the other way, using my Haxe library from Javascript code I wrote. I’ll learn more as I go.
I think the weakest part of Haxe is the ecosystem. The developers I have talked to so far are great; the language seems to attract good people. There’s a conference, a forum, and an IRC channel. However, the community is smaller than for Actionscript or Javascript: fewer people, fewer books, fewer web sites, fewer tutorials, fewer examples, fewer libraries. A few years ago when I chose Actionscript over Haxe, it was because I thought people would be using snippets of my code in their projects, I wanted to pick a language that lots of people used. That doesn’t seem to be helping me much. Instead, people read the code and learn from it, but write their own code, or they want to use my library as-is. So the number of people using the language is less important to me now. Supporting multiple platforms is becoming more important. With the map generation project, it was frustrating to have written everything for the client (Flash) and then later needing to run it on the server (C++). As HTML5 improves, I’m targeting more HTML5 and less Flash. Both of these tell me that cross-platform is becoming more important for my projects.
My current plan is to use Haxe for code I want to run across platforms, and use Javascript, Python, and C++ for code that is platform specific.
Update: [2013-Apr] Although I still use some Haxe, I'm not using it for cross-language coding much. For my web tutorials, I write in Javascript directly, except for core data structures and algorithms which I write in Haxe or Typescript, to get classes and type checking. For Flash projects, I use Haxe as a nicer Actionscript but I don't use the cross-language features, nor do I use NME for compiling to mobile. By the time I'm ready to write a game, the landscape (Typescript, Emscripten, Asm.js, ASC 2.0) may have changed enough that I'll re-evaluate then.
Labels: flash , haxe , programming
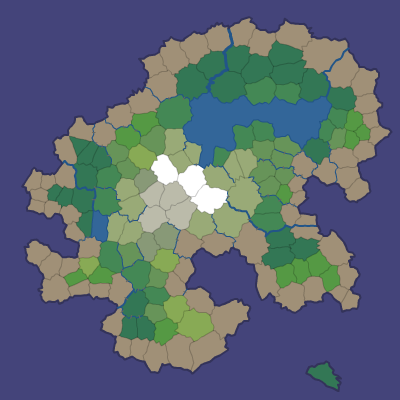
Polygon map generation, part 3 #
In the previous blog posts (part 1 and part 2), I described generating random polygonal maps with elevation, moisture, biomes, and rivers. For some games, those maps are sufficient. However, in other games I want to hide the polygon structure. In this blog post I'll describe how to render the polygons into a game map that doesn't look polygonal, and conclude with the demo and source code.
The full article is here. There's also a demo and source code.
Noisy Edges
Recall from earlier that there are two graphs: one for Voronoi
corners (1, 2 in the diagram below) and edges (blue lines), and
one for polycon centers (A, B) and Delaunay edges (red
lines) between them:

I wanted to add some “noise” to the the straight lines. I tried making them move randomly, but sometimes lines would cross, and I realized I needed to constrain them so that they would never cross each other. The second thing I wanted was to make sure that the lines had as much space to wander as possible.
I realized that points A, 1, B, and 2 form a quadrilateral, and
I could constrain the wanderings of the line segment to that quadrilateral:

I further divided the quadrilateral into four quadrilaterals. Two were usable for the red (Delaunay) edge and two for the blue (Voronoi) edge. As long as the lines stayed within their allocated space and met in the center, they'd never cross each other. That takes care of constraining them.
The entire map can be divided up into these quadrilateral regions, with no space left over:

That ensures that the noisy lines aren't constrained any more than necessary. (I wonder if these quadrilaterals would be useful for game mechanics.)
I can use any noisy line algorithm that fits within these constraints. I decided to subdivide the quadrilaterals recursively and stitch line segments together within the small quadrilaterals into a complete edge. The result is here:

The noisiness is tunable, and I have examples at segment size 7, segment size 4, and segment size 1. In the map demo I use segment size 1 for rivers and coastlines, 3 where biomes meet, and 10 elsewhere.
More noise
I'm generally a fan of noise in game art, and wanted to add a little bit of noise to these maps as well. In a real game map the noise might reflect vegetation or small variations in terrain. In the demo I just filled the screen with a random noise texture, and smoothed the colors between adjacent polygons:

However, with a bit more random noise, we can generate this (described in the full article):

Here's a rendering with 16,000 polygons, noisy edges, a noise texture overlay, and simple lighting:

Demo
I wrote a Flash demo to explore the generated maps:

The simplest way to explore the maps is to click Random and the various View options.
In a shape number like 85882-3, 85882 chooses the overall island
shape and 3 is the random number seed for the details (random points,
noisy edges, rivers, lava). You can type in a shape number and press
Return to generate that map. The demo also shows some unfinished
features that may be useful for some games: lava, roads, and
watersheds.
Source
I've placed the Actionscript source under the MIT license; it's available on github. There's an overview page describing what's in these blog posts, along with notes about the code. I don't expect that the code will be immediately useful to anyone, but it might be a useful starting point if you'd like to use these techniques for making your own game maps. The diagrams are built with 300 polygons, the demo uses 2000, and the code can go much higher, although I've not tried above 16,000.
If you find the ideas or code useful, I'd love to hear about it!
Update: [2010-09-22] I added a noisier rendering, which is described in the full article.
Flash 10: drawTriangles() disappointments #
I've been switching to Flash 10 for my game experiments. Flash 10 offers new graphics APIs, and opens up new approaches for how to deal with game objects. I wanted to compare these approaches:
-
(Flash 9) Use multiple
Spriteobjects for hierarchical layers, filters, rotation, and translation. It's convenient to have one or more Sprites per game object, and then move and rotate them without having to manage them manually. For vector drawing, I can usebeginFillandlineStylewith (Flash 10)drawPath. For bitmap (textured) drawing, I can usebeginBitmapFill, or there's a specialBitmapclass for rectangular bitmaps. -
(Flash 10) Manage my own list of objects, and then build up a vector of
IGraphicsDataobjects, and pass that toGraphics.drawGraphicsData. This puts the burden on me to handle translation and rotation, and I don't see a great way to add filters. Here too I can use eitherbeginFill+lineStyleorbeginBitmapFillfor vector or bitmap drawing. -
(Flash 10) Manage my own list of objects, build up a vector of vertices and another vector of texture coordinates, and use
Graphics.drawTriangles. I have to handle translation and rotation of the vertices, but Flash will handle the translation, rotation, and scaling of the textures.
Note that there's actually a lot more flexibility than just three
options. There are three ways to draw polygons (lineTo, drawPath,
or drawTriangles), two object management approaches (using
Sprite, or managing the list manually), and whether to defer
drawing using IGraphicsData. Which approach should I use for a game
like my spaceship
demo?
Convenience
One of the things I love about Flash is that drawing is pretty
convenient, especially with Sprite objects, bitmap handling,
translation/rotation, easy filters like drop shadow, and vector
drawing. For example:
var s:Sprite = new Sprite();
s.beginBitmapFill(texture, null, false, true);
s.drawPath
  (Vector.<int>([1, 2, 2, 2]),
   Vector.<Number>([100, 0, 164, 0, 164, 64, 100, 64]));
s.endFill();
To rotate or translate the game objects, set the s.x, s.y, and
s.rotation fields. When you need a new game object, instantiate a
Sprite and insert it into the hierachy; when you want to remove one,
remove the shape. Flash handles the rest.
With Flash 10, the IGraphicsData interface lets you store graphics
commands in objects, and then draw with them later. You can either
call commands similar to the Flash 9 API, or you can store graphics
data in a more direct form. Once you've assembled all the graphics
objects, you can draw them all using Graphics.drawGraphicsData.
v[0] = new GraphicsBitmapFill(texture, null, false, true);
v[1] = new GraphicsPath
   (Vector.<int>([1, 2, 2, 2]),
    Vector.<Number>([100, 0, 164, 0, 164, 64, 100, 64]));
v[2] = new GraphicsEndFill();
graphics.drawGraphicsData(v);
You can draw each of these to a separate Sprite, or you can assemble
them all into one big vector and make a single call to
Graphics.drawGraphicsData. The main value I think is to be able to
batch them up, so I decided to make a single call, but that means I
need to manage translation and rotation myself. Instead of creating
new graphics data objects, you can update them every frame. Each of
my game objects can keep a reference to where in the graphics data
array it is represented, and then when I want to update the game
object, I can change the corresponding GraphicsPath object. For
rotation, I need to edit the path and also the bitmap rotation in the
GraphicsBitmapFill object.
Adding and removing game objects is a little trickier. Either I can rebuild the entire vector every time, or I can build something similar to a memory allocator, so that I can reuse parts of the vector. I haven't yet decided how I'm going to handle this (my tests so far have a fixed number of game objects).
The Flash 10 Graphics.drawTriangles interface is somewhat
inconvenient when working with 2D data. It requires that all polygons
be decomposed into triangles (not hard to do but it's an extra
step). The function takes a list of vertices, a list of indices that
point into the vertex vector, and texture coordinates.
graphics.beginBitmapFill(texture, null, false, true);
graphics.drawTriangles
 (Vector.<Number>([100, 0, 164, 0, 164, 64, 100, 64]),
  Vector.<int>([0, 1, 2, 2, 3, 0]),
  Vector.<Number>([0, 0, 1, 0, 1, 1, 0, 1]));
graphics.endFill();
Here too I need to handle translation and rotation myself, by updating
the vector. However I don't need to rotate the bitmaps because
drawTriangles takes care of this for me. Adding and removing
objects is similar to the previous case, in that I need to handle it
myself.
Overall, the traditional API is most convenient, but deferring the
drawPath by putting it into a GraphicsDataPath is convenient
too. The drawTriangles interface is least convenient, except for not
needing to rotate bitmaps.
Performance
I've found that my intuition hasn't been a great guide for
understanding Flash performance. My intuition told me that approach 1
(Sprite objects) would be slower than approach 2 (global graphics
data list), and approach 3 (triangles) would be fastest of all.
I wrote a test program that drew 400–1000 square objects on the screen at once and moved them around. I also put in options for rotation (because many of the objects in the spaceship demo were rotating), use bitmap or vector graphics (I like noise in art and bitmaps seem to be the way to make that), using outlines for vector graphics (I like outlines!), and animating bitmaps.
My general conclusions, for this style of game:
- Vector graphics are faster than bitmap graphics (especially when rotation is involved), but that using outlines on the vector graphics slows them down, about as much as bitmaps do. Also, if the vector graphics have any additional complexity, the bitmaps end up being faster. Since I almost always want outlines or some other edge effect, bitmaps shouldn't cost me that much, and they'll give me a lot more options for adding details.
-
Using the separate
Spriteobjects is about the same speed as using a singleIGraphicsDatavector. Sprite objects are more convenient. However, once I want animation, theIGraphicsDataapproach shines: I can swap in alternative paths and bitmaps at no cost, whereas with drawing directly, I have to redraw to get animation (it's possible that I can create lots ofSpriteobjects and then swap them out but I haven't tried this). -
For consistent frame rates, it's best to minimize allocation, and reuse some objects. The
IGraphicsDataobjects, the vector of them, and the vectors fo vertex and index data all can be reused from frame to frame, with additional complexity to track where everything is. -
With the triangle API, I can put all my textures into one big bitmap, and then access them using texture coordinates. This allows me to make a single
drawTrianglescall. However, using hundreds of ofGraphicsBitmapFillandGraphicsDrawPathobjects is suprisingly faster than using a singledrawTrianglescall. I was unable to make the triangle approach faster.
The performance of drawTriangles (even when I used
GraphicsTrianglePath) was a disappointment. My thanks to Alex from Wild Shadow Studios for his help in understanding the APIs and performance.
Rendering
It wasn't enough for drawTriangles to be slower for this type of game. I've also had issues with the bitmap rendering. Here's a 64x64 test image drawn in several ways:
-
A
Bitmapobject. -
A polygon drawn with
beginBitmapFill. -
A
Bitmapobject rotated 90 degrees clockwise. -
A polygon drawn with
beginBitmapFill, rotated 90 degrees. -
Two triangles drawn with
drawTriangles, and u/v range from 0 to 1. - Same as 5, except u/v adjusted by 1/64.
- Same as 5, rotated 90 degrees.
- Same as 6, rotated 90 degrees.
Note that images 1 and 2 look the same. This is as it should be. If I believe the documentation, image 5 should look the same as 1 and 2. But it doesn't.
As far as I can tell, drawTriangles is assigning a u/v coordinate of
1.0 to be pixel 62 instead of pixel 63. If you look closely, you can
see the gray pixels are getting blurred (stretched). A “fix” for this
is in image 6, where I set the u/v coordinate to 1.0 + 1/64, so
that it picks pixel 63. With this hack, the image matches the
reference image 1.
Images 3 and 4 are the same as 1 and 2, but rotated 90 degrees clockwise. Images 7 and 8 are the same as 5 and 6, rotated 90 degrees clockwise. Notice that 7 is incorrect (it should match 3), but it's incorrect in a different way than 5. Instead of losing the yellow and blue edges, it loses the green and yellow edges. The hack in image 6, when applied to 8, fails. That means it's not as obvious as pixel 62 instead of 63; there must be a weirder issue that I don't understand.
These issues with drawTriangles rendering make it hard to recommend
for 2D graphics. I don't need everything to be exactly the same, but I
do plan to draw 1-pixel outlines around my sprites, and
drawTriangles can't preserve the outline. Even worse, as I rotate my
game's objects, the outlines will appear and disappear.
The drawTriangles API also has some weird effects when using Flash's
built in zoom function (right click and choose Zoom In). It also
doesn't seem to be happy when using bitmap fills with repeat set to
true. And it doesn't seem to handle texture scaling as well as the
regular APIs (it's possible they aren't using
mipmaps).
Conclusions
For both convenience and performance for games like my spaceship demo,
I think I should have every game object store some IGraphicsData
objects, and also store a vector of all of them. I had thought that
drawTriangles might be better, but it's both slower and less
convenient. It also doesn't look as good. I think I might take a look
at drawTriangles for 3D perspective graphics, or if I had lots of
triangle data, but for 2D or orthographic 3D, I think it's probably
not the best choice for me right now.
Labels: flash
Noise in game art #
If you look at the artwork in old 2D 8-bit games, you see a lot of noise and dithering in the hand-drawn bitmap art. For an example, take a look at the grass or concrete in this Transport Tycoon screenshot:

When the gaming world moved to 3D 32-bit vector art, we lost some of that level of detail. We got lots of smooth areas. Eventually we mostly got the detail back by applying textures to the polgons. However, it often looks worse to me than the old hand-drawn art.
With my Flash experiments, I've been playing with 2D procedural vector art, and I've been trying to figure out how to make it look nicer without drawing textures by hand. The simplest thing I found has been to apply noise to the art. On the left is some terrain without noise and on the right is some with noise:


I like the noisy version much better.
The noise layer is fairly easy to apply; I use BitmapData.noise() to
generate it, and then use BlendMode.ADD to add it to the original layer.
  var noiseTexture:BitmapData = new BitmapData(128, 128);
  noiseTexture.noise(Math.round(Math.random()*65536),
                     0, 8, 7, true);
  var noise:Shape = new Shape();
  noise.graphics.beginBitmapFill(noiseTexture);
  noise.graphics.drawRect(0, 0, size, size);
  noise.graphics.endFill();
  layer.draw(noise, null, null, BlendMode.ADD);
  noiseTexture.dispose();
It's nice in that it inherits the color already there; the noise doesn't impose its own colors. However, this only works nicely on my background terrain, and it feels somewhat slow on my low-end machine.
For foreground sprites, the noise layer doesn't move when those
sprites move or rotate. An alternative would be to draw the noise on
top of my sprites, using Graphics.beginBitmapFill(), but that would
require that I have a way to compute the outline of my procedural art,
so that I can draw the noise on top as a polygon. Another alternative
would be to use bitmap fills for every polygon, but that requires that
I have a noise bitmap for each color. And yet another alternative is
to draw every polygon twice, once for the color and once for the
noise.
With Flash 10 I had hoped that the pixel
shaders would allow
me to apply noise to anything. I played around with them a bit. The shader
receives the output coordinates in a function outCoord(), and can
compute a color for that location. It can optionally include
parameters (like a noise bitmap). The big problem is that the output
coordinates are in screen space. This means that when the sprite
moves or rotates, or if you zoom in, the noise would stay fixed
relative to the screen. I tried both using shaders for fills and
shaders for filters, and neither gave me what I wanted.
That's a serious problem for my use. To address this problem, I can pass in additional parameters like rotation and offset. However, I have to re-fill the shape every time I change the shader parameters. Even worse, the pixel shader is recompiled every time you fill.
So it looks like pixel shaders in Flash 10 just don't do what I want. I want a way to get the pixel's location in the sprite's coordinate system, after transforms are applied, but instead I only get the screen's coordinate system.
I think my best bet for performance is to not apply noise to vector backgrounds (applying noise to a bitmap won't impact performance). This will make me sad but smoothness matters a great deal. I should also try using tiles to see if that is any faster. For foreground objects, it's probably not too bad to draw everything twice, but I'll have to test this. It may not matter if I switch to bitmap sprites eventually; they'd let me draw a lot more details.
Switching to Flash 10 #
On this blog you can see some of the experiments I've been playing with. In 2004, I started looking at Flash, mostly because I'd be able to share my experiments on the web. But at the time, Flash wasn't as free or accessible, and I switched to Java. Dissatisfied with Java, I took a look at Flash again, and started writing Flash 8 code. Two years ago I switched from Flash 8 to Flash 9. Flash 9's language (Actionscript 3) is much nicer than Flash 8's language (Actionscript 2). It's a modern programming language, with classes, objects, closures, recursion, XML, JSON, etc., and was tracking ECMAscript until the Javascript folk changed direction. Flash 9's graphics libraries are nicer than Flash 8's. It supports a tree of layers, each with its own rotation, scaling, alpha transparency, shadows, and other effects.
Flash 10 uses the same language as Flash 9. Its libraries have lots more features, especially in the graphics system. There's now a low-level graphics API that offers partial 3D, higher performance, and pixel shaders. I was slow to move to Flash 9 in part because the adoption of Flash 9 was slow. It looks like Flash now has auto-updating, and Flash 10 is being installed much more widely. I'm switching all my current projects to Flash 10.
For Flash 10 I'm using the free Flex 3.3 SDK and the Flex
3.3 docs (online or download). The
SDK comes with a command line compiler, mxmlc, that I run
with mxmlc -target-player 10 on the “main” program, and
that will also compile anything else that is used by the main
class. If you want a tutorial for using mxmlc, see
senoular's mxmlc beginner
guide.
Flex also comes with a compilation shell, fcsh, that lets
you keep the compiler in memory to avoid the 2 seconds to start it up
every time you want to recompile. I wrote a wrapper around this so
that whenever I save something in Emacs, it automatically recompiles.
That way, my development cycle is: edit, save, and reload in the
browser. It's quite nice to have a fast cycle.
I haven't played much with the Flash 10 library additions, but the first thing I used was the bitmap line support. I'm using it to draw dashed lines as striped lane dividers. I plan to read about the new library features, but not try them until I find a possible use for them in my projects.
Update: [2012-02] [2010-03] Flex 4 is out, and includes updated documentation, and downloadable documentation. Like Flex 3, it targets Flash 10 but can also be used for earlier versions of Flash.
Update: [2013-04] This seems to be the new command line Actionscript compiler, for Flash 11 / Stage3D / AIR.
Labels: flash , programming
Flash 9 triangle gradients #
Flash 9 offers the beginGradientFill() method for drawing N-color 1D linear and radial gradients. However, I couldn't find a way to draw 3-color 2D gradients as seen in OpenGL.
I could compute the gradient myself and just set pixel values in a BitmapData, and then render those pixels to make my triangle. But that's no fun. It turns out BitmapData objects support lots of interesting operations like add, multiply, subtract, and even a limited form of lookup.
By incredible coincidence, triangles have three vertices and colors have three components. So you can use colors to store information about vertices. (Note that in the 3D DirectX/OpenGL shader world we do something similar by storing normal maps in color channels.) Here's what I came up with:
- Make a triangle bitmap where the red, green, and blue components of the color correspond to the barycentric coordinates of that point in the triangle, scaled to 0–255 instead of 0–1. I only have to do this once.
- Make a gradient array for the three colors I want at the vertices. The gradient array is 256 elements and it's merely the red, green, and blue values scaled down. At position i I'll store the color scaled to i/255 brightness.
- Use
BitmapData.paletteMap()to map the red, green, and blue components to the scaled colors in my three gradient arrays. ThepaletteMap()function adds the color values in those arrays to produce the final color.
This is what the triangle bitmap looks like. The red, green, and blue channels represent the barycentric coordinates:

The way this technique works is that paletteMap() calculates the output color at each pixel to be array1[red] + array2[green] + array3[blue], where the indices are the color components from the input array. In the input array, red+blue+green equals 255, and the three arrays have the color scaled up to 255. So this gives me interpolation between any three colors. For example, if red is 20, green is 80, and blue is 155, then the final color is array1[20] + array2[80] + array3[155] = (20/255*color1) + (80/255*color2) + (155/255*color3), which is the interpolation we want. Here's an example of what happens when we apply this to a triangle with green, purple, and yellow vertices:

I should also note that paletteMap() can take four arrays instead of three; the fourth is alpha. I tried building an Alpha+RGB quad bitmap for mapping, and then using four colors with that. Unfortunately I couldn't get it to work. I think paletteMap() uses alpha both for the map and for the blending (this is undocumented). Or maybe it's doing something else I don't understand. In any case I gave up on it.
The big downside of this technique is that you have to fill those arrays each time. In general, this could get expensive. If the triangles are small, it'd be faster to directly compute the interpolation per pixel (the "not fun" technique I mentioned at the top). However, in some situations you only need a few colors, and can precompute those gradient arrays. A friend of mine wants to use this for lighting calculations, and for white lights you can precompute all 255 light levels. I was hoping to use gradients to render a map (like the one in the spaceship editor demo), and if my maps contain only a few terrain types (grass, sand, etc.), I can precompute all my gradient arrays. I can use this technique to compute a color gradient bitmap, and then mix with those with my terrain textures using the standard blend operations.
Eventually I'll be using Flash 10, and that'll open up new techniques, especially with shaders. But for now, I'm using Flash 9 for my site, and I'll try to push BitmapData to do some things it probably wasn't meant to do.
Labels: flash
Game Component: Spaceship editor, part 4 #
Last year I decided that I just don't have the time and energy to work on a full game, and instead I should work on quick prototypes instead. I had planned to try an idea every few weeks. The space station generator was one of these; the spaceship editor was another. Spaceship physics turned out to be really interesting and I kept working on it. It's been months now. I have lots of other things I want to try, so I need to wrap this up, even if there's more I could do.
In the last post I talked about the physics. The final step was to figure out whether there were interesting tradeoffs that a player could make when designing a ship. I needed a spaceship editor.

I made a circle that could be dragged around with Flash's built-in draggable object feature, but I switched to handling the mouse events myself, so that I could add "snap to angle" and other constraints. It wasn't long after having a draggable circle that I made a circle for each thruster. And then two, one for the head and one for the tail. I also wanted the thruster to move as a whole if you dragged the base, but only the tip to move if you dragged the end. I overlaid these on a large version of the ship to make a ship editor. Now I could start answering the key question: are there interesting design choices?
After playing around with lots of configurations my answer was no. It's always better to put the forward thrusters near the wingtips. You don't lose any forward thrust, and you gain a great deal of rotational speed. The other thrusters were less of an issue, because they were used for less common motions.
To make this interesting I need some disadvantage of putting forward thrusters at the tips. One thing I considered was that thrusters at the edges of your ship are more vulnerable to damage. However, I don't actually have a game here, so that's not something I can easily test. So I turned to the other idea: thrusters require support that have mass. Putting a thruster far from the center requires more massive supports, which slow you down. I started with mass and moment of inertia calculations from physics, and then used tuning and experimentation to come up with something that felt reasonable. The main tradeoff I focused on is between rotational and forward acceleration, when both are from the same forward thrusters. If you move the thrusters near the wingtips, you get lots of rotation, but you need a lot of mass for the structural supports, and that slows your forward acceleration. This plot shows acceleration versus thruster distance from the center:

It shows that at least for the forward thrusters, there's a nice tradeoff between rotational and forward acceleration, and you can't get unlimited rotational power because the supports become too massive. There are lots of other things I could look at, but I think some tradeoffs depend on the game (for example, they may be completely different if the ship is in an atmosphere than if it were in space), and I'm not writing a game right now.
I eventually recognized that I could keep working on this for a long time, but I need to move on and explore other topics. I've mostly answered the question I set out to answer: if you let the player design the spaceship, are there interesting tradeoffs arising from the physics? I think the answer is yes, but probably not as many interesting tradeoffs as Spore's approach would allow. In addition, things weren't automatically interesting; I had to design a tradeoff and then tune the physics to make that tradeoff show up, and I had to be careful to avoid overpowered ships. That was unsatisfying. In a real game I imagine I'd have to manually design lots of tradeoffs for different game levels or areas of the world, and it'd be quite tough to test all the combinations. And even if I could do that, controlling sliders in a continuous tradeoff space seems less fun than picking from some really interesting manually designed items in Spore or Ur-Quan Masters. So yes, I was able to make what I set out to make, and it was fun to play with, but probably would be a lot less work and more fun to give people a few interesting choices.
The Demo
Of course after all that I should let you try designing your own ships and see what you think. Instructions:
Press T to change ships (you may have to click on the map first to get focus). The demo ships are: yellow square (4 thrusters), green square (like yellow but you can make it asymmetric), teal curved, purple curved (like teal but two thrusters are broken, so it can't fly properly), blue square (8 thrusters!), red triangle (goes fast but can't turn well). I mostly play with the yellow and blue ships.
Change the ship by dragging the thrusters and adjusting their size and orientation. As you do this, watch the graphs. The bar charts show what happens if you press one key at a time. The polygons represent your current flight envelope for two keys at a time. I find that I use the W+A and W+D combinations often, so I watch the chart in the lower left. The shaded ovals show the "target" that you want to mostly cover if you want a reasonable ship. The yellow and blue ships are easy to improve: just increase the power of the thrusters and they will fly well. The teal and red ships are slightly harder, and the purple ship is near hopeless. In a real game the number and power of your thrusters would be limited, and fuel efficiency and fuel tank size would be additional factors to consider.
Fly the ship around with W=forwards, S=backwards, A=rotate left, D=rotate right, Q=slide left, E=slide right, Z=reset position.

Try the demo.
The demo is written with Flash 10 in mind. It should work with Flash 9 but there may be some visual artifacts (due to bugs in Flash 9 that I didn't work around). There are some other minor bugs that I might fix someday.
I'm finished with the spaceship editor mini-project and haven't decided what the next mini-project will be. I really enjoyed working on the spaceship physics and editor, but I spent too much time on it, and hope to spend less time on the next mini-project.
Update: [2009-12-05] If you want to try a game that lets you create your own spaceships, check out Captain Forever. It's pretty neat.
Update: [2012-08-16] Another game that lets you design your own spaceships is Gimbal.
Update: [2012-10-15] Also see Evolving Spaceship Designs for Optimal Control and the Emergence of Interesting Behaviour [PDF], by Samuel A. Roberts and Simon M. Lucas, or watch the video.
Update: [2017-01-05] Another game that lets you design your own spaceships is Reassembly.
Update: [2019-09-17] Check out Cosmoteer, which lets you construct your own spaceships, and then the crew automatically figures out which thrusters to fire to go in the desired direction.
Game Component: Spaceship editor, part 3 #
I've been trying out a few ideas with quick & dirty demos to see if they're at all promising as part of a game. Two posts ago I talked about a spaceship editor, where you could place the thrusters, and the “AI” would learn how to pick thrusters that most closely matched your desired motion. In the last post I spent some time describing how I spent some time trying to figure out the characteristics of the ship, how I learned more about the problem I needed to solve, and some of the things I tried to find a “nice” solution to the math. I was really happy with the things I had worked on. However…
The real questions I wanted to answer were:
- Is it actually fun to fly a ship with this physics model?
- Is it actually fun to design a ship? In other words, are there interesting designs and tradeoffs?
Somewhere during the process I realized that getting the “nice” solution wasn't that important, and I had probably spent too much time on it. (Reading this article reminds me that I get distracted too easily on fun problems and I have trouble completing things.) I wasn't getting closer to answering the important questions. Instead, I was having fun learning some math that I had forgotten 15 years ago. Having fun learning math isn't bad; it's just not the main goal.

To answer the first question, I spent some time in various ships just flying around. My conclusion was yes, it's fun to fly around in a world by itself, but no, it doesn't seem like it'd be fun in an actual game, where there are other things to do. And that's when it hit me: all that time I spent thinking about the math might have been a waste of time (except that it was a lot of fun to learn some math); I should first make sure I can make the ships fun to fly.
I flew around a lot and thought about what bugged me. The main problem was that inertia was fun at first but it seemed to get annoying after a little while. For example, if I'm moving forwards with W, and then I rotate left with A, I'm still moving, but my jets are pointed at an angle. To stop moving you need to use a combination of S and Q. Even worse, since it's a keyboard instead of an analog controller, you can't hit the right mix of the two to make yourself stop.
In addition, it wasn't clear to me whether the controls should set acceleration, velocity, or target position. Acceleration was the most natural thing, and that's what I started with. But that means when you hit any key, you start out slow, then go faster and faster, until it's out of control. That might be realistic but it's not much fun. I switched it to setting velocity. But what velocity should I target? I arbitrarily chose some multiple K of the acceleration, so that after K time you'd reach that velocity.
I also needed to do more tuning. The mass, moment of inertia, friction, and rotation/translation tradeoffs are set arbitrarily. I had tried adjusting this but none of the parameters were quite right, and every time I changed the physics it got worse, and I had to tune to make it better again.
I tried to answer the second question (whether there are interesting ship tradeoffs) by creating several ships. Based on that experience, my answer is maybe. The ships I made are noticeably different but I have a clear favorite. If there's only one best ship then the ship editor's not going to be interesting. The problem is that the answer to the second question depends on what I do with the physics.
So I decided to work on the physics first.
I tried tackling inertia directly, with some ideas from a friend:
Inertia in World Coordinates gives me realistic physics for flying ships. This is what I had started with, and this is what I was unhappy with. When you're going north, and turn left, you keep flying north. The inertia keeps moving you north, even if you face west.
Inertia in Ship Coordinates gives me something that behaves more like a vehicle on wheels. When you're going north, and turn left, you start going west. The inertia keeps moving you forwards, whatever direction that may be.
No Inertia would mean that you only move when thrusters are fired. This is the most extreme change but if inertia is really a problem then it's worth a try.
I also tried treating rotation differently from x and y, because rotation seems to lead to some of the situations that make the ship less fun to control.

It was only after playing with the various options that I learned that I do really want inertia in world coordinates. Sometimes I just have to try something to help me learn something (also see this blog post). Having no inertia, or inertia in ship coordinates, just didn't feel fun to fly at all, and that's not what I would've predicted. I had the right form of inertia; something else was wrong.
After all the testing, I realized I wanted inertia but not the full effect. At low speeds, inertia is great, but at high speeds, inertia is less fun. With inertia alone it takes as long to speed up as it does to slow down again. It's okay if it takes a second or two to reach a high speed. But when I let go of the keys I want the ship to come to a stop pretty quickly. I added a force to slow the ship down. I tried three approaches:
Constant force decreases velocity V by up to K. This can be interpreted as surface friction.
Linear force decreases velocity V by K*V. I don't know what this might correspond to in physics, but in the calculations it corresponds to “reducing” inertia.
Quadratic force decreases velocity V by K*V*V. This can be interpreted as air resistance.
All three of them helped. After trying and tuning the three I decided that the linear force reduction was the most pleasant, but still not ideal. With quadratic, the problem I ran into (which I might have predicted if I were smarter) was that you can't increase your maximum velocity much if you add thrusters. Instead, it was largely determined by the air resistance. That would be fine if I were creating just one ship, but for the ship editor to be interesting, I need the number and power of the thrusters to actually matter! Constant friction left too much of your motion determined by inertia at higher speeds. The linear slowdown felt the best. I can't justify it if I were going for realism, but I'm going for fun, not realism.
I think flying the ship can be made fun. The next question to tackle is whether there are interesting tradeoffs in ship design.
Game Component: Spaceship editor, part 2 #
In the last post, I described a fun problem I wanted to play with, and my initial attempt to solve it. I made several ships, figured out how their thrusters worked, and built a simple system for flying. The keys were W for forwards, S for backwards, Q for slide left, E for slide right, A for rotate left, and D for rotate right. Once I flew them around and saw that it was fun, and ship design might be interesting for the player, I wanted to understand better the characteristics of the ships. So I did something that often helps me: visualize the data.
In this diagram you can see the black dots are the possible outputs for the first test ship, viewed from three different perspectives. You can see that it's not completely random. There's a definite shape there. The variety of shapes is what makes this problem interesting. I plotted these for all of my test ships, and learned a lot. For example, look at the lower left plot (with the A–D + W–S axes). From it we can learn that the ship flies forwards quickly (W) but backwards slowly (S). It can rotate left (A) and right (D) slowly. Going forwards makes it easier to rotate quickly; going backwards makes it harder.

While flying the ship I noticed however that there was a second problem I hadn't appreciated at first. When choosing outputs that are “close” to the desired output, a difference of +3 to +4 is nowhere near as significant as a difference of 0 to +0.1. When the player wants zero movement, it's very important to keep it zero. If one key is pressed down, then there should be one non-zero in the output; if two keys are pressed then there should be two non-zeros. The most common case for the random input/output pairs is to have no zeros, but the most common case for the player is to be pressing just one key, and thus needing two zeros!

Because my random input/output approach was fun but didn't handle the one and two-keystroke cases well, I also looked a few different analytical approaches to compute the reverse mapping directly. I looked at the pseudo-inverse operation, which is like matrix inverse but works with non-square matrices. However, it didn't look like it would help me. I also looked at it as a linear programming optimization problem. That approach looked promising but the Simplex algorithm was more than I wanted to implement.
None of the mathematical approaches I saw directly matched the problem I was trying to solve. It's easy to add the constraint about zeros to a linear programming problem but not to the matrix pseudo-inverse. It might be made to work with the random input/output pairs, by adding some weights to the output components, but the outputs generated from random inputs almost never contained zeros, so I'm never going to get exactly what I want.
One of my habits that seems to work well for me is to alternate between working things out on paper and writing code. The ship thruster physics, the input/output pairs, and the matrix math I first worked on paper, then implemented it. So I went back to paper and pen for this problem. Can I increase the number of outputs that contain some zeros?
First I tried changing the way I picked random inputs, and favored 0 and 1 instead of evenly uniformly choosing any number between 0 and 1. That didn't help much (but I later had an insight related to this change, so maybe it was useful after all). I decided I needed to attack the problem directly. The idea of interpolating between output points was still in my head, and I used that here. If I picked two points on opposite sides of a zero plane, I could find some interpolation that was on the plane. I took pairs of the random input/output pairs and solved for any zeros on the line between them. This worked well! I now had a new set of points that had one zero in the output. By applying the algorithm again, I could find a set of outputs that had two zeros.
In this diagram you can see the black dots are the random outputs projected down to the three planes, and also the white dots, which are formed from finding the point in between two black dots that intersects the plane. The space covered by white dots is more limited than that for black dots. That's because there are some wild movements that can't be controlled if you try to restrict one of the outputs to zero.

I had up to 1000 random input/output pairs. Solving the equations for every zero plane and every pair that was on opposite sides of the plane meant I needed to solve a matrix equation around 750,000 times. It took a while but it was reasonable. Applying this again to get the outputs with two zeros would've been too slow. And I wanted this to be fast enough so that you could see the flight characteristics as you were editing the spaceship.
Have you ever noticed that you often find something or think of something only after you stop looking for it? I've noticed that this happens for me when solving problems. I had gotten stuck with the brute force technique and I needed something smarter, but I was getting nowhere. So I stopped working on the problem. A few days later, while playing a game, I had an insight that should have been obvious from the start.
All the random inputs are thruster settings from 0.0 to 1.0. We're taking matrix M and multiplying it by a vector T, which must be in a fairly small space. If there are N dimensions, T is an N-dimensional vector, and all its components are between 0.0 and 1.0. That means … the space of all valid thruster configurations is a unit N-dimensional hypercube.
A wise man once told me that it's sometimes easier to solve the general case than the specific case. I had been trying to solve the specific case, of a single input mapped to a single output. And then I'm using computational power to handle lots of them. The general case is to take the entire hypercube and transform it to the output, and see what comes out.
What comes out is a polyhedron in 3 dimensions.
This insight seemed like it came out of nowhere, while I was playing a game, killing orcs. But when I thought about it more, I think it wasn't out of nowhere. If I were smarter I would've figured it out from the very beginning, but some things I had thought touched on the hypercube approach. One clue was that when I picked random numbers for inputs, I found that it useful to bias towards 0.0 and 1.0. My experiments were guiding me towards choosing the vertices of the hypercube. Another clue was that in linear programming, you can think of the valid space as a convex polyhedron in some higher dimensional space. I had spent some time thinking about what the polyhedron represented in my problem but I wasn't able to make the connection. A third clue was that plotting the black and white dots made it look like there were simple polygons involved.
For N thrusters the hypercube has 2N vertices. In this diagram you can see the hypercube vertices, multiplied by the matrix, do cover the space that the random points covered. As before, the black dots are the random sample. The colored dots are the vertices of the hypercube.

Instead of picking lots of random points, I should pick these points. And then I can take every pair of these and find the interpolation that has a zero output. And then I can take every pair of those and find the outputs with two zeros.

I worked this out on paper. Page after page of solving equations for test ship 1, following by plotting things out on graph paper, convinced me that this was quite promising.
I was really happy with myself. I had figured out a much more elegant
solution that didn't involve random numbers.
I took the equations I solved on paper and wrote some code to solve them. I tried it out on several different ships. And then I ran into a problem. For one of my ships, with 8 thrusters, the algorithm still ran rather slowly. Why? Well, 28 is 256. Finding the one-zero outputs involved examining 215 pairs in 3 dimensions, or around 100,000 systems of equations to solve. It took a few seconds, but I hadn't gotten to the one-zero case yet, which is the really expensive one. For this ship I was almost as slow as the random point approach. The random points were slow but equally slow for all ships, whereas the hypercube vertices got worse every thruster you added. Ick. While starting a cube lamp on my desk, I realized that all the useful zeros should occur along edges, not as interpolations between two arbitrary points. I could reduce 28 pairs X 27 pairs to just 28 pairs X 8. Much faster! However, that was only the one-zero outputs. I still had to run the interpolations again, to find the two-zero outputs. And even with the optimization that was around 1,000,000 systems of equations. I was sure there was another optimization involving surfaces instead of edges but I just couldn't figure out what it was.
So I took another break. I spent some time plotting what I had, to see if there were insights I could draw from the visualization. I plotted sets of points and found that many of them just aren't relevant because they're in the “interior” of the areas. All I care about is the perimeter. To compute the perimeter in two dimensions is a well-known problem: convex hull.
I thought about how to compute a convex hull, and it seemed rather simple. I wrote down my notes, then proceeded to see what the standard algorithms were. None of them seemed as simple as my algorithm, which meant my algorithm probably has a bug. But I couldn't see what it was, so I decided to let it wait a bit. A few days later, still unable to think of a flaw, I sketched out the math on paper, then implemented it. Although I had a few bugs in the code, the algorithm itself worked.
Once I had the convex hull algorithm available, my next step was to use it to simplify the one-zero outputs into a convex hull before finding the two-zero points.
In this diagram you can see the points that make up the convex hull. As before, the white dots are the interpolations between random points, to find positions on the zero plane. The colored points with black borders around them are the interpolations between hypercube vertices, fed into the convex hull algorithm. You can see that all the points I computed from the random set lie within the convex hull computed from the hypercube vertices.

In fact the two-zero points always occur between adjacent points in the convex hull, so I had gotten yet another optimization out of this change. However, I discovered that my convex hull algorithm does have a flaw. When there are collinear points it doesn't always remove all of them. The flaw remains in my code; it doesn't seem to be a big deal in practice, because my code is now “fast enough”. For each of the five test ships, generating the flight parameters takes less than a second.
Another thing that wasn't clear to me when I started was that when you press both W and Q, you want to go both left and forwards, but there's not a fixed ratio between the two. Sometimes you can get both and sometimes you have to make a tradeoff, and none of the techniques worked out of the box for that. I think this might be something to leave to the ship designer, once the flight characteristics are known. For example, in the above diagrams you could have a way to mark what you want a combination of keys to do.
It's been a fun journey. I've taken off some rust from my skills. And I learned a bit more about linear programming, the simplex algorithm, physics, and convex hulls.
However, I haven't yet written an editor. But I now have the physics and math worked out, so once I have an editor, you'll be able to see the flight characteristics of the ship you're editing. I'll post the demo and source here. It will be nice if there are interesting tradeoffs for the player. For example, if you put jets on the wingtips, you can rotate very quickly, but perhaps it adds a lot of mass to make the wings sturdy enough to take jets, and that extra mass slows you down in terms of forward acceleration. Once I have the editor I'll get a better feel for whether there are interesting tradeoffs to be made, and whether this would be useful to have in a game.
Game Component: Spaceship editor, part 1 #
I've been playing Spore recently. It's an interesting game. One of the criticisms is that the physical characteristics of the things you do in the editor don't make a difference to gameplay. For example, having wide legs or narrow legs or four legs or six legs doesn't affect your speed. Only the +Speed items affect speed. Only in the Cell stage does placement matter. I read some of their reasoning behind this design and I agree with it. In a game where creativity is more important than realism, simplifying that aspect of the game will encourage people to be more creative in their designs. I know that if the number of legs actually mattered for gameplay, I wouldn't have made my creature hop around on one leg.
Although I think they made the right decision for Spore, I was inspired to explore the alternative: something where the way you design your creature matters a great deal. To fit in with the 2d top-down theme I've been using (see the space station miniproject), I'm using spaceships instead of creatures.
The main idea for this miniproject is that you'd design the ship, and then the “AI” would learn how to fly the ship you designed. For example, let's consider the following ship with four thrusters:
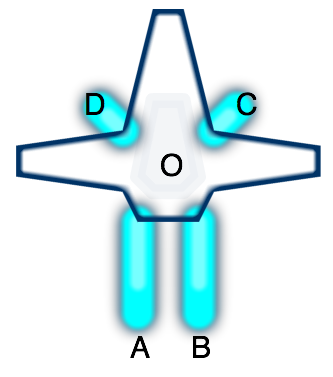
If you fire either thruster A or B, you'd end up rotating. But if you
fire both at once, you would go forwards. Given a set of thrusters
(location on the ship, direction they fire, and their maximum power),
I can calculate the effect on the ship (acceleration and rotational
acceleration). Initially I was calculating the force to be only what
was transmitted along the A→O vector, but later I realized that
because the ship is rigid, the entire force gets transmitted to the
entire ship, and is independent of the location of the thruster.
Since thruster A fires in direction (0, +2), the force on the ship is
(0, -2). Rotation is slightly trickier, as we need to calculate
torque, and take into account the rotational moment of inertia. For
now I'm assuming the mass and moment of inertia are constants, but
later I'll compute these based on the characteristics of the ship. The
torque does take into account the position of the thruster, and we
have to compute the cross product of the A→O vector (-2, 4) and the
force vector (0, -2).
The forward mapping from thrusters to forces turns out to be a matrix multiplication. Each thruster is a column and each effect on the ship is a row. Doing this for each of the thrusters, we get the thruster matrix M mapping thrusters to force and torque:
| M: | A | B | C | D |
|---|---|---|---|---|
| Fx | 0 | 0 | -0.5 | 0.5 |
| Fy | -2 | -2 | 0.5 | 0.5 |
| Tq | 10 | -10 | 1.25 | -1.25 |
Given a thruster configuration vector T, M∙T gives us the forces acting on the ship.
The real problem though is reversing that mapping. The player presses a key to move forwards, and I need to figure out which combination of thrusters best accelerates the ship forwards. What value of T leads to M*T being close to [ 0 1 0 ]?
The simplest approach is brute force. So I started with that first. I generated lots of random inputs and calculated their outputs. Then when I needed some particular output, I scanned them all and picked the input that most closely generated that output. Over multiple simulation cycles, any errors would be corrected by picking different input/output pairs. I could make this even more stable by iterating within a single simulation cycle, and interpolating among the results.
This approach worked reasonably well!
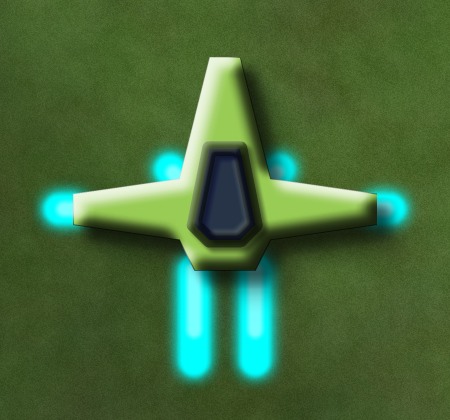
The ship behavior was interesting. My first test ship (the one I'm using for these examples) moved reasonably well forwards and backwards, and could rotate well, but it couldn't slide left and right quickly.
My second ship is a variant of the first. When moving forwards it can rotate well, but if you're stationary or going backwards the rotation is limited. When you fly it you'll see that if you want to rotate, you need to move forwards at the same time. Here's what it looks like:
My third ship had reasonable movement, and rather asymmetric: it could rotate and slide left at the same time, or rotate and slide right at the same time, but it was much slower if you rotated left while sliding right or vice versa. It looks a little different from the first two, but right now that makes no difference in the physics:

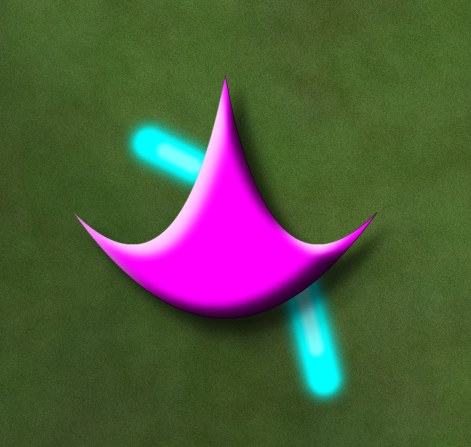
My fourth ship is a damaged version of the third ship, to see if having inoperable thrusters would make for interesting gameplay. Going forwards would also make you spin around in circles. It was fun to play with in the prototype but I'm not convinced it'd be fun in a game. You can see why it's unstable:
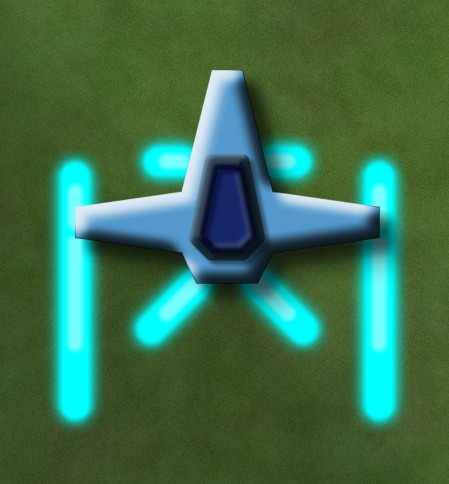
My fifth test ship could rotate very quickly but couldn't go backwards at all (at least until I fixed a bug in the physics calculations), so you'd turn around and go forwards in order to stop moving. This might be a ship you can't build until later stages of the game, when you've gained building points or parts or money. Just look at how much power it has:
At this point the prototype made me think there was something potentially fun for a game. You could design your own ship and make tradeoffs. The game “AI” would learn how to map your keys to thruster movements, and the player would then have to learn best to use the controls for navigation and combat. For example, having to turn a ship around to stop is unusual but you might design a ship that way if you could get lightning-quick rotation in return. You might design different ships for different levels. Or you might learn how to play a ship so well that you don't want to switch to something else with different characteristics.
I knew the ships were all different in their behaviors but I didn't understand what their limits were. So my next step was to try to understand the flight characteristics of the ships. That's for the next post.
Game Component: Radial Base Layout #
I haven't had the time and energy to work on a full game (the transportation game is on hold) but instead I'm playing with lots of little ideas, some of which turn into demos. This week's idea is to algorithmically generate layouts for space stations or space bases, so that they all look different. Originally I had a lot more variety in mind, but for the demo, I only implemented simple radial layouts:
I wrote some notes about the algorithm, the source code, and how to use this in a game.
Update: [2008-12-02] I forgot to mention my motivation: I was looking for something very simple that would compile to a small size and generate “programmer art”. The layout and rendering for this compiles to under 5k, and I'd guess that it could be under 3k for something more specialized. The small size and large variety makes this a reasonable thing to include in a browser-based game.
Interactive A* Illustration #
A few months ago, I wrote that I was working on interactive illustrations for my A* pages. Has it taken that long? Well, I've actually had things working for a while now. I just haven't published it. Why? It turns out that my A* pages, which I wrote a long time ago, are really out of date. As I was trying to illustrate various concepts, I was trying to illustrate the concepts from my pages, but not all of them worked well in my Flash program. I eventually realized that some of those concepts are just unimportant in practice. I also discovered that the style I used in my diagrams only works for very simple maps. Once you add terrain into the maps, the visual style fails to convey the concepts I wanted to illustrate.
I haven't yet resolved these issues, which are taking a lot more time than writing the code itself. The algorithm and data structure code is complete, so I've uploaded them to my web site. You can see source code and the applet running on a square grid. The code is released under the MIT license; feel free to use it. I made the A* portion work on any graph, and included square, hexagonal, and triangular grids. This isn't the most efficient approach, but I wanted something flexible so that I could later use it in my article on grids. I haven't finished the hexagonal grid code yet; the only thing missing is the pixel coordinate to hex coordinate transformation. Enjoy!
Once I figure out the best way to display the important concepts for A*, I'll update my A* pages to use the interactive diagrams.
Interactive illustrations #
When I'm taking a class, or reading a textbook, or reading an article, there's text that explains a topic, and sometimes illustrations that help visualize the material covered in the text. Sometimes there are diagrams that show things that are not in the text, and charts that summarize data sets that are not included in the text. When these materials are put on the web, those illustrations, diagrams, and charts remain as they were in print: they're static.
In class I often would wonder what would happen if something was changed. For example, in the programming languages course we saw a program and what would happen on the stack and heap to store data. What happens to the stack if you change the order in which you declare variables? I now know the answer to the question, but it would have been nice if I could somehow walk up to the board, change the program text, and watch the diagram of the stack update itself to reflect the change. Although in small classrooms you might be able to convince the instructor to do this, it's completely impractical in a large class to answer every student's question this way. I can't change things in textbooks or articles either.
But now we have the web. There's the possibility of interacting with the course material. Why don't we see much of this?
- When teaching a subject, you have a set of points you want to illustrate. With an exploratory tool the student may or may not actually reach all the points you want to teach. When those points come up in an exam, the student might not be able to answer all the important questions.
- It costs much more to develop interactive material than to develop static material. It's not only the cost of development but also in design.
- Web technology for interactive sites (Javascript, Flash, Java) is still somewhat unpleasant and non-portable. The dominant technologies did not win for being elegant or fast or easy to use; they won for other reasons.
Web pages are still (mostly) written in the style of books and articles. This is understandable. Films were originally in the style of stage plays. It took experimentation to discover the things you can do by changing scenes, camera angles, etc. A century later, filmmakers are still experimenting, and developing new techniques (examples: showing simultaneous scenes, time lapse, bullet time, showing the same scene from different angles at different times). Web authors have experimented with frames, multiple windows, Java applets for computer algorithms, and writing entire web sites in Flash. I think there will be many more decades of experimentation.
For many years now I've been wanting to put interactive illustrations on my site. There are concepts like distance, movement, pathfinding (A*), scripting, grids, AI, and simulation that I'd like to illustrate. For example I used a Java applet to demonstrate a UI for building roads in simulation games. However I wasn't happy with it. It was a separate page, not integrated into an article that explained the concepts. Java was heavyweight and tricky to get working across browsers. Several authors have produced standalone A* exploration applets or applications, but they too weren't integrated into an article. It wasn't until I saw Raigan and Mare's article about collision detection that I saw what I wanted. Their article uses static illustrations to demonstrate concepts without using interactivity, but makes those illustrations interactive to allow the reader to explore on their own. This addresses my concerns about interactive tools not showing the student the important points. They use Flash to implement their illustrations. Flash is so lightweight that at first I didn't realize their illustrations were interactive. There's no “loading” screen and your browser doesn't slow to a crawl. I don't know how the cost of developing them though.
I had mentioned a few months ago that I haven't been working on my transportation game. It's true, I haven't. I've continued learning Flash but I'm working on diagrams for my site instead of a game. So far my experience has been rather positive. Flash has been easier to learn and use than I expected. The raw graphics libraries are nicer than what I had used before (PyGame, OpenGL, SVG, and Java2D); however, the user interface libraries (buttons, scrollbars, etc.) are worse than those in Java Swing. I especially like that the graphics libraries include things that are useful for illustrations: overlays, translucency, and bevel/glow/shadow effects. For example, you can draw an arrow overlay on top of the illustration without redrawing the illustration itself, or add a glow effect to the object you want the reader to pay attention to. Flash's performance is reasonable. The library reference is nice. There's a free command line compiler for people who don't want to use Adobe's fancy IDE. I'm enjoying it.
My first project has been developing a grid library, using the algorithms from my grid article to generate the illustrations on this page and this page. The most surprising thing for me has been that the 300k of images on those pages could likely be replaced by a 10k Flash file. So far my Flash program compiles to 6.5k, but it doesn't have a UI that lets you select various algorithms and heuristics, and it also doesn't allow you to draw your own obstacles on the grid.
I'm going to follow the style in Raigan and Mare's collision detection tutorial: using Flash to replace static illustrations, not to use Flash for the entire site. I'm also keeping the images as fallbacks for people who don't want or use Flash. Since most of the illustrations need to stand alone without user interaction, the fallback technique works well in this context. While working on the A* illustrations, I realized that my A* pages are nearly ten years old, and my thoughts on the subject have changed somewhat. I'd like to go back and update them to reflect my new thinking. But first, I'm going to add interactive illustrations.
Update: [2011] - I wrote this post in 2007, when Flash was my best choice for interactive diagrams I could embed into a web page. Browsers have advanced quite a bit since then and I'm using HTML5 (SVG and Canvas) for most of my new interactive diagrams.
Labels: flash
Learning Flash 9 #
This week I switched from Flash 8 to Flash 9.
Since last year I've
been playing
with Flash 8, using the Motion-Twin command-line
compiler mtasc. I was using it to write a transportation game, and I had something running and was making progress, until Supreme Commander came out. Then I went back to playing games instead of writing them. Although I'd still like to work on that game, I've found that I also want to use Flash to build interactive demonstrations of concepts I describe on my site. For example, in my article about grids I'd like to make those diagrams interactive so that you can better see how the coordinate systems work. Diagrams are now what I'm using to learn Flash; I may go back to the game later (or maybe not).
I like mtasc. However, it only supports Flash 8
(Actionscript 2), and is not going to be updated for Flash 9
(Actionscript 3). It's a dead end. Flash 9 is not only
significantly faster
(almost as fast as Java), but it also has major changes to the
libraries. Instead of mtasc, you can
use HaXe, which is a new language
similar to Actionscript/Javascript/ECMAscript. HaXe looks neat
(better types, type inference), but it's a different language, not
Actionscript. Part of my goal is to publish my source code so that
others can use it, and it's less useful to publish code that isn't
usable in Actionscript. It's also less useful to publish code that
requires an expensive development environment (for example, Flex, at
$500). And it's easier to learn a language when there are lots of other users, posting tips. So I've been staying with mtasc; the same code
works with both mtasc and the Flash 8 development
environment.
Last week Rich Collins
pointed me to the free command-line Flash 9
compiler, mxmlc. Wonderful! It's free, it's Flash 9,
it's command line—just what I was looking for. I spent a few days
learning about Flash 9, and
found this
tutorial and these tips to be most helpful. My initial thoughts:
- (yay) Flash 9 has much better libraries than Flash 8. The sprites (movieclips), the event handling, and the graphics commands are all nicer.
- (boo) Actionscript 3 is more verbose than Actionscript 2, with
types, packages,
public,override, and other annotations. It's less of a scripting language and more like Java. This is bad. - (yay) Flash 9 is much faster than Flash 8, in part thanks to all those type annotations.
- (boo) The
mxmlccompiler is significantly slower thanmtasc, in part because it's written in Java, which has a high startup time. - (boo) The
mxmlccompiler is not open source.
I've been converting some of my code from Flash 8 to Flash 9, and despite the increased verbosity, I've been happy with it. If you want to use Flash 9 with free command-line compiler, start with this tutorial.
Update: [2007-07-28] [2010-03-25] You can download the Flash command-line compiler (Flex mxmlc) for free, without registration, from Adobe. Once I learned the language, the Flash 9 library reference became my #1 source of information.
Labels: flash , programming , project
Learning Flash 8 #
Back in 2004, I attempted to learn Flash programming, but failed to find free tools, and ended up writing Java applets instead. I was unhappy with Java for a number of reasons, but the main one was that Java applets are clunky on web pages compared to Flash objects, and as a result more people have Flash than Java. A few months ago Troy Gilbert pointed me at OSFlash.org, which has a list of open source Flash development tools (thanks Troy!). I eventually found the free and fast Motion-Twin ActionScript compiler (mtasc), but had a lot of trouble using it. The tutorials I found on the web for Flash development assume you're using the Macromedia development environment, which I'm not, so they weren't much help. I finally figured out what I was doing wrong.
I'm used to a certain development model: you write a program, (optionally) compile it, then run it. This might be considered “old school” by people writing Windows and Mac apps. When writing Windows and Mac apps, you put the source code with various resources (icons, graphics, music, dialog boxes, etc.) into a “project”, which gets compiled into an executable. In the “old” style of development (used for C++, Java, Python, Perl, Basic, Ruby, etc.), your program reads in resources after you run it. That's how I've been writing my games. Flash seems to follow the “new” style of development, in which lots of resources, not only source code, get combined into one package.
The open source mtasc compiler only compiles Flash (ActionScript) source code. It does not handle the resources that have to be assembled into a compiled Flash file (SWF). The mtasc tool will compile your source code and update a SWF file with the compiled code, but you can't use mtasc to create SWF files; they have to exist already. For that, you normally use the (commercial) Flash development environment from Macromedia. If you want to fully work in an open source world, you need another way to assemble resources. The swfmill tool can do this: it converts an XML file listing resources into a SWF file. With swfmill my toolset is complete.
The other thing that's confusing (for me) about Flash development is that it seems to be designed around movies, and every Flash program has a “frame rate”, even if it's not a movie. For now I'm ignoring this and just setting a low frame rate.
The summary of what I've learned so far about open source Flash development:
- Create an XML file that describes the resources you need. I'm using the example XML file in Mark Winterhalder's well-written tutorial on the
swfmillsite:<?xml version="1.0" encoding="iso-8859-1" ?> <movie width="320" height="240" framerate="12"> <background color="#ffffff"/> <frame/> </movie>
- Compile the XML file into an SWF file:
swfmill simple example.xml example.swf
- Create an ActionScript file with your script. I'm using an example I found on the
mtascsite:class prototypes { static var app : prototypes; function prototypes() { // creates a 'tf' TextField size 320,200 at pos 0,0 _root.createTextField("tf",0,0,0,320,200); // write some text into it _root.tf.text = "Hello world !"; } static function main(mc) { app = new prototypes(); } } - Compile the ActionScript into your existing SWF file, using the -main flag to have it automatically call the
main()function:mtasc example.as -swf example.swf -main
- Embed the SWF into a web page using the <embed> tag, as described on the haXe site:
<html>
<body bgcolor="#cccccc">
<object classid="clsid:d27cdb6e-ae6d-11cf-96b8-444553540000"
  width="320" height="200" id="test">
<param name="movie" value="example.swf" />
<embed src="example.swf" width="320" height="200"
  name="test" type="application/x-shockwave-flash"
  pluginspage="http://www.macromedia.com/go/getflashplayer"
/>
</object>
</body>
</html>
- See the results in a browser. Hooray!
For me, getting started is the hardest step. Once I have something running, development becomes easier. Now that I have a Flash program running, my next steps are to set up my development environment, then learn about the Flash libraries. I've been wanting to learn Flash programming for a long time, but I kept getting stuck. I'm quite glad I finally put the pieces together, and I hope the above description helps others get started.
Labels: flash , programming , project